Setting Up Your XC120 + XE121#
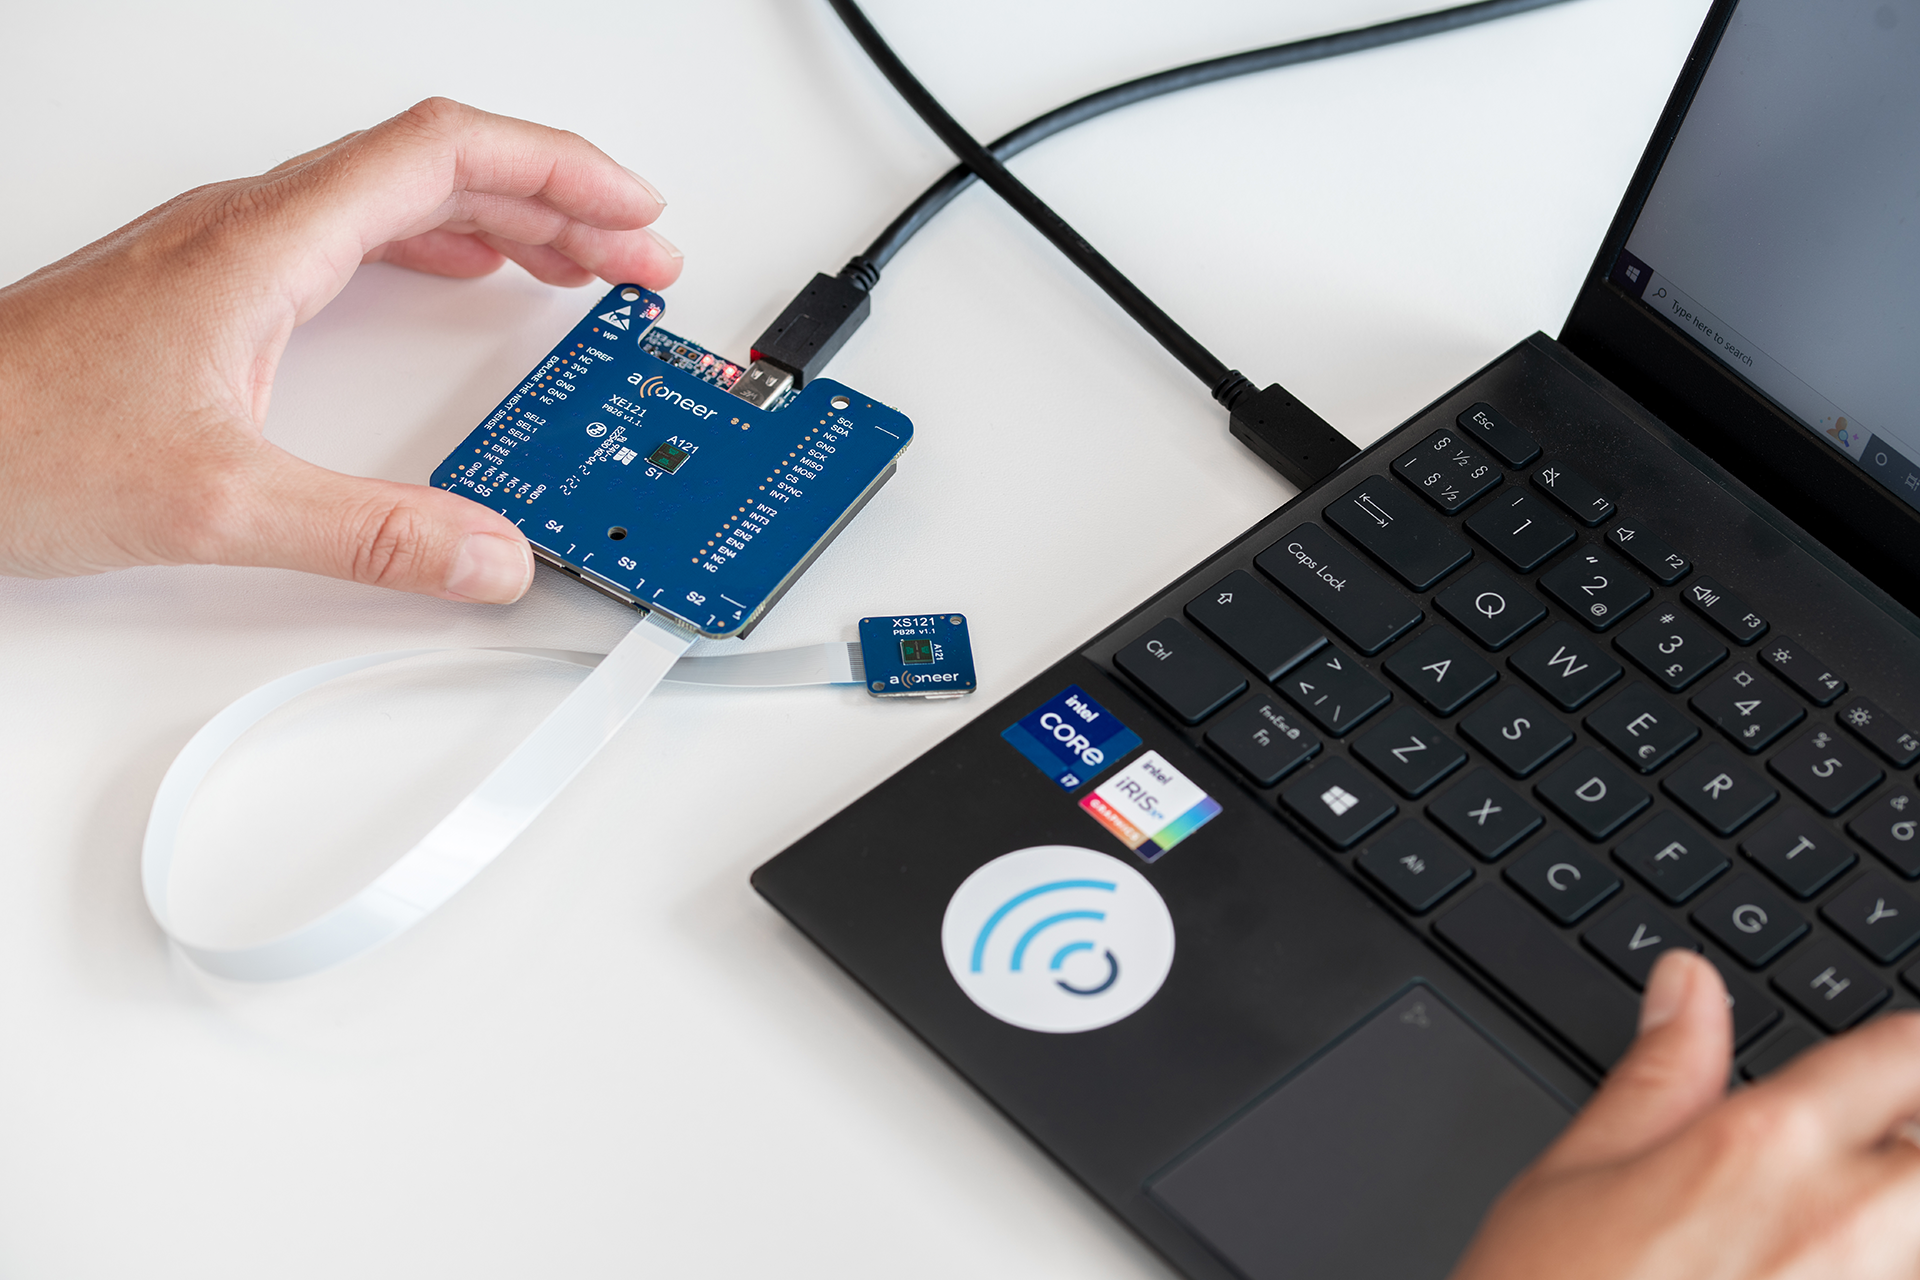
A great way to evaluate the A121 sensor in Exploration Tool is to use the XC120 connector board together with the XE121 evaluation board. Multiple XS121 satellite boards can also be connected to the XE121 evaluation board for multi-sensor evaluation. The XS121 satellite board has a small form factor and is connected to the XE121 evaluation board with a flex cable (included with XS121), enabling high flexibility in the evaluation. A USB-C cable (not provided by Acconeer) is needed to connect the XC120 board to a PC.
Hardware Overview#
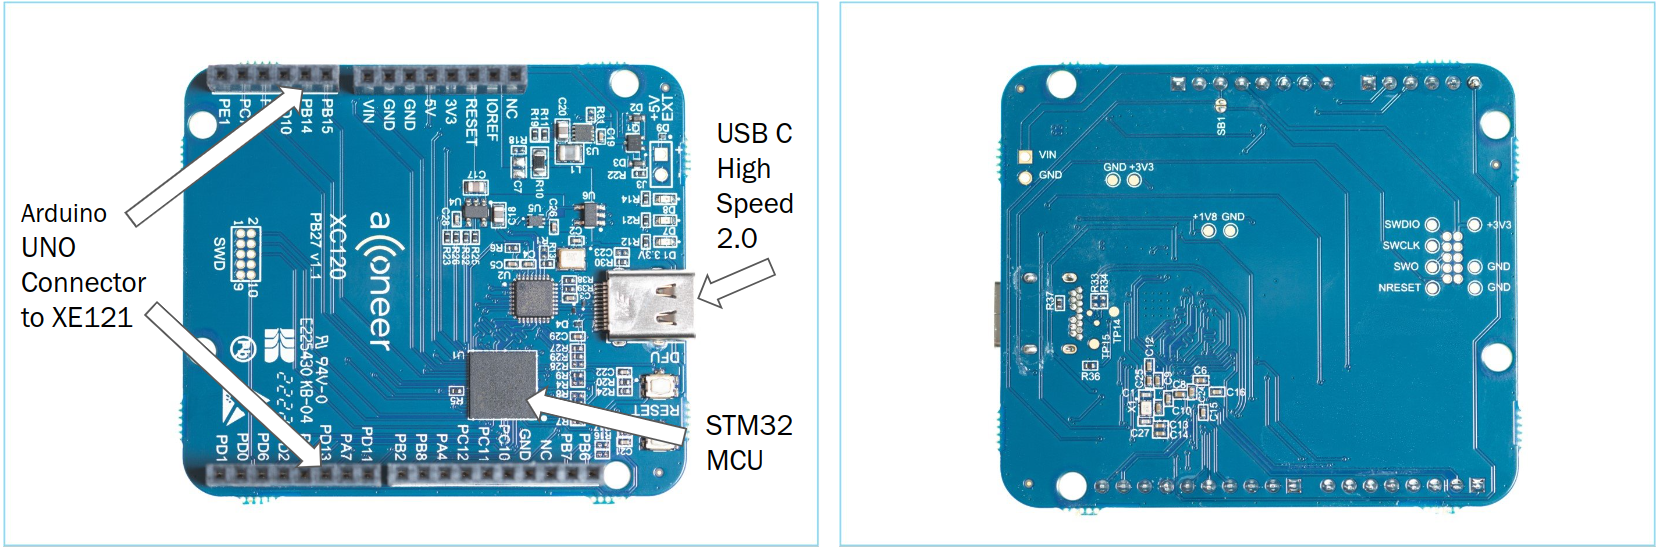
The image below depicts the XC120 from the front (left) and back (right).
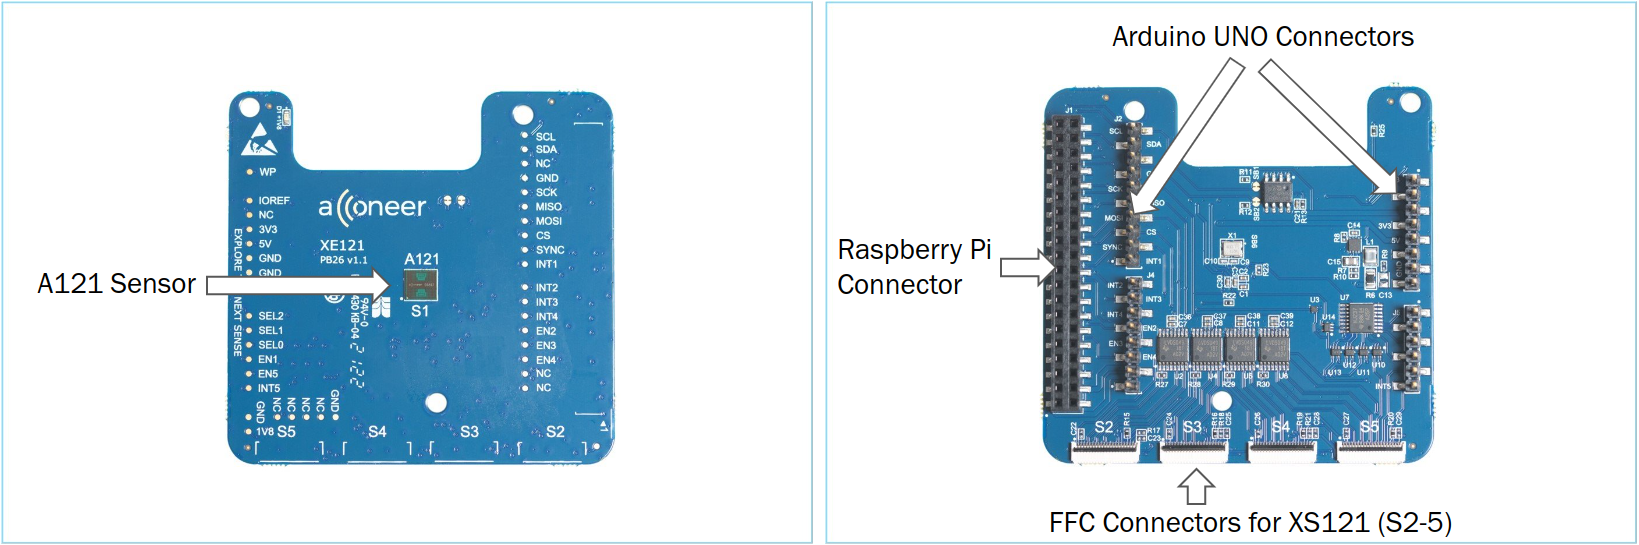
The image below depicts the XE121 from the front (left) and back (right).
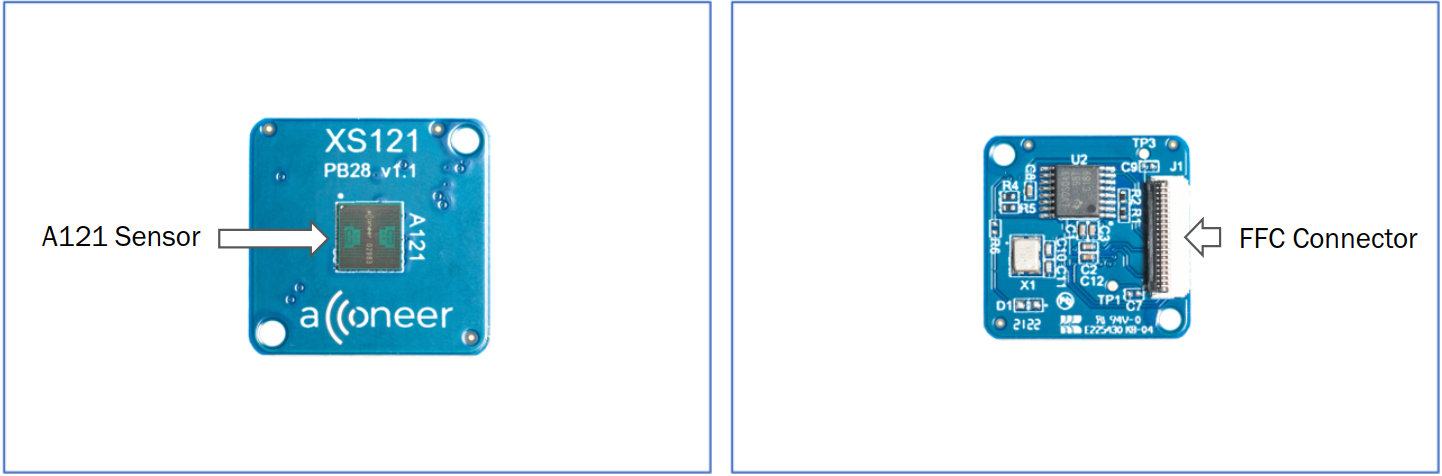
The image below depicts the XS121 from the front (left) and back (right).
The image below depicts all the boards assembled.
Flashing#
The most convenient method to prepare the XC120 board for flashing is to let the Exploration Tool Application automatically download the latest binary file from our developer page. If you want to flash a binary that you have locally on your computer; that is also possible.
Depending on how you installed in Exploration Tool Installation, start Exploration Tool by either
Double-clicking the
run_appscript,Running the command
python -m acconeer.exptool.appin your terminal.
Then get started by pressing the Flash button in Exploration Tool and you will be guided through the flashing process.